Tuesday 29 September 2015

peace and joy (Christmas series tutorial)


Here's a card for you to create that is simple and elegant. Here's how to do it.


Cut and fold 10 card bases, 5 1/2" by 8 1/2". Also you will need 10 pieces of watercolor paper, 3" by 3". I forgot to cut the mat pieces for this so we'll just do that later.


Using the evergreen image from Lovely as a Tree and black Stazon ink, stamp the watercolor paper in random places similar to what I did on these. I did have to turn some over and use the back since the first one didn't work out! There were two I had to take new paper for, but in the end I was happy with my trees!


Now comes the fun part! Using your aqua painters and stampin' misters thingies, play around with watercoloring and misting different colors onto your tree image papers. I put one drop Tempting Turquoise into the water in one mister and Cherry Cobbler into the other. Some places I swirled and dabbed my aqua painter dipped into various blues. Kept it subtle though. Like a winter morning sky. If the papers curl, don't worry as you can use your heat tool to dry the water and it helps uncurl them. Also I've had really good luck just gently bending them back to shape when they're dry.


Okay, I said earlier I'd forgotten to get you to cut those blue mat pieces. I used several different shades in cooler tones, but I'm sure you could use a pink if you wanted to warm things up a bit. Those pieces should be 3 1/2" by 3 1/2". I used core'dinations paper (retired) and distressed the edges. 
Next you assemble the card using pop dots. Stamp on your sentiment and you're done! I used the Alphabet Rotary Stamp and wrote "PEACE AND JOY" which may seem trite and boring until you really think how absolutely wonderful it is to be at peace and to have a heart full of joy! Not boring at all!


Thursday 24 September 2015

reason for the season (Christmas series tutorial)

OKAY!! Here's the card you've been waiting for! A card that is a single layer and can be mailed with NO EXTRA POSTAGE! Trust the "emboss resist technique" to provide you this fantastic card! I'm often surprised how complete you can make a card when you create this way.


 First cut 10 white card bases 5 1/2" by 8 1/2".
 

Now fold them in half!


We are using three Stampin Up stamp sets for this card: Reason for the Season from this year's Holiday Catty, Gorgeous Grunge from the Annual and Ornamental Pines from last year's Holiday Catalogue.


Clear emboss the poinsettia and sentiment from Reason for the Season as well as the dotty image from Gorgeous Grunge. There is no rule for where these dots go, but if you look carefully at the pictures (especially of the finished card, you'll get the idea.)


Using Stampin' Write markers in Crushed Curry, Cajun Craze and Cherry Cobbler, color in the center and first round of petals (above and below)  Wipe off the excess ink from the embossed edge.


 Sponge Cherry Cobbler and Garden Green strategically over the card front. Wipe off excess ink.


With Garden Green stamp those same dots from Gorgeous Grunge, the pine image from Ornamental Pines as well as the Poinsettia image from Reason for the Season around the edge of card. Wipe off excess ink AGAIN!!


It may be that no one will notice this little detail, but a good quality card usually has hidden details that you notice later...or only if you study it well. Take a Gray marker and make shadows along the petals where they'd be naturally shadowed. Makes it look 3-D.


Look at that, my dear! Check out those gorgeous cards! All 10 of them! And below is the single card...all finished! What do you think? Easy, huh??!!

wishing you Christmas joy

Remember I said I was going to show you some more cards with the Sleigh Ride set. Well. Here is another card. I popped a layer of vellum on top of the "town" and the trees and sleigh are on top of the vellum. If you sponge a bit of blue ink onto the bottom of the two back cut-outs the front designs pop out better.

Wednesday 23 September 2015

happy birthday fish

Don't you think this would suit a teenage boy? I have such issues trying to figure out boy-cards. Anyway, I don't know if you can tell, but there's a little ziplok bag of HAIR GEL between the layers with the cutout and popped up fish behind it! I added a couple drops of Pool Party ink to the hair gel and my friendly 4-year-old squished it until the colors blended. Soooo cool!

Friday 11 September 2015

reason for the season (christmas series/tutorials)


A sudden stroke of brilliance hit several weeks ago when I thought of the many many cards I hope to make for the holidays this year. I so badly wish I had friends close by to create with, but since I don't, I figured I could just pretend you all were here with me and we'd do a series of tutorials together. Ten cards of each style each time. I originally thought I would do a batch every week, but my life is simply full of too many variables for that. So we'll take it one post at a time. 

Today we start with SU's Reason for the Season stamp set along with its coordinating Festive Flower Builder punch. Purchase these together and you save 15%! What's not to love about that?! And see what you can do with it??? This particular card is fairly time consuming, so it would really be fun to make together with several friends and maybe try it assembly line style. But I did it alone so it's definitely possible.


Alright, let's start by chopping a bunch of cardstock. You'll want 10 each of the following: 
8 1/2" by 5 1/2" white cardstock (card base)
4 1/4" by 5 1/2" black cardstock (bottom layer)  
4" by 5 1/2" Typeset Specialty DSP (aka Designer Series Paper)


With your brand new Festive Flower Builder Punch, punch out enough petals from red cardstock to make a total of 10 poinsettias. You will need:
40 large petals
40 medium petals
20 small connected petals
From yellow cardstock you will need to punch out 20 tiny crisscross pieces for the poin center.
Out of green cardstock, punch 30 large leaves.

You may notice I have different reds. I ran out of one color so just grabbed another. Also, this is a sort of a squareish poin. Some people have made gorgeous flowers using many more petals, but I figured if we wanted to save any time at all, maybe we should cut down the number of petals. Also, with more petals it wouldn't fit quite so well on this particular card.


Using Reason for the Season stamp set, stamp the veins into the petals and leaves using a darker shade of ink the same color as petals or leaves. Make sure to keep the points pointed up!


There they are! All stamped!


Score each petal and leaf. If you don't have scoring equipment, like me, improvise! I used my silicone pad, a clear block and a stylus. Worked like a charm!


Fold them all in half lengthwise.


To make each flower start by using the silicone pad and hot glue gun and gluing the tiny petals together in the center. NOTE: hot glue doesn't like extreme temps so if you're hoping to mail this and chances are it'll get really cold, you may want to use glue dots. It's gonna take a LOT of those! But you're card will arrive in great condition.


From underneath hot glue the medium sized petals onto the smaller ones.


Then add the largest petals...


...and three leaves.


Two of the teeny yellow crisscrossing pieces go in the center of the flower...


...and then a rhinestone.


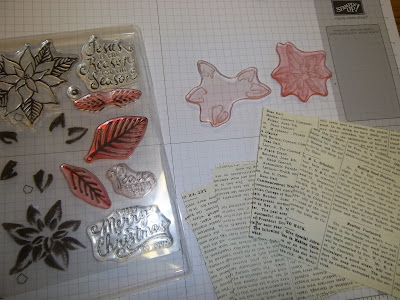
 Now pull in that typeset DSP and the stamps. I'm not using the outline of the poinsettia stamp since I want these blooms to be more in the background and not too detailed. Notice how stained my stamps are. That's perfectly ok and they work just as well this way if I clean them every time. I call them well-loved! We'll stamp those on our DSP in random places. I used Riding Hood Red and Cucumber Crush. SU now has those handy little arrows on the photopolymer stamps so it's easy to line up the 2-step stamps.


See? Ain't that perty?!


There's a teeny tiny little center stamp that I popped in the middle of these poins in yellow. In a way I think it's optional as both with and without look great.


Using Apothecary Accetns Dies I cut two labels, one from Timeless Elegance DSP and one from Vellum. 


The sentiment "Peace be with you" fits nicely on the Vellum piece.


 Assemble your cards, all 10 of them, using glue dots to adhere the poin on the left side of the stamped DSP as well as the left side of vellum label. It works well to use normal glue runner for the black label. Attach to card base and you're done!


Here's a close-up again. Nice, eh?


Here's a poin I made with "coredinations" paper from long ago.


WOW!! 
Now I'm hoping to hear from some of you! I realize not everyone is as inclined to comment or write as I am, but sometimes I wonder if I'm doing this blog mostly for myself! Let me know if you're there! 
Say Hi!