
Tuesday, 29 December 2015
Sleigh ride dies...lakeside scene
happy birthday dogwoods

Using that beehive die from SU (what's it called? Maybe honeycomb?) I created a card front that has holes in it. While you and I both ask "Where and how do you write anything inside and not have it show through?" I leave that hurdle to both of our creative abilities to get over! Ha! Did that sentence make sense?!
Below you see a close-up of my blossoms, which, by the way, are from an old die from a different company. (Again I don't have the name handy.) But what I DO have handy is the fact that you can easily use dies and punches from SU for the very exact same effect!

Now isn't that a fun springy card?
toilet paper thanks

You wouldn't have guessed it would you??!! I wanted a soft-looking paper behind my delicate butterfly and I also wanted only blues and whites for this spring-like card. Sitting on my craft table was a roll of Charmin!!!! (Dunno how it got there!!!) Anyway, I figured "YES!!" Somewhere through the years I'd heard of using it for a background, but had long forgotten. I tried embossing it dry but that didn't work for me as I wanted a tattered look. Besides the dry layers just separated. So I gently spritzed it with my Stampin Misters and lo and behold it WORKED!!! And it tore just BEAUTIFULLY!!!
Next time I want to put a drop of color into my mister. Wouldn't THAT look fantastic???
sympathizing...calla lilies

Remarkable You has some gorgeous images and I love it that this calla is very easy to fussy cut. I kept seeing these as elegant sympathy flowers so when the mom of my childhood friends passed away, what better image to use for sympathy cards for the family. I cut a single blossom for the inside of the card and then wrote my own sentiments inside the cards. Scroll down to see the purple callas as well.


joy joy joy one last time

Monday, 30 November 2015
for the new two (wedding)

SU's set "For the New Two" is the focus of these two cards. The card above is made using a Spellbinder's die and then black embossing and ribbon. Also matted on black.
The card below was simply created to show one of my very young friends how the emboss resist technique worked. She wasn't convinced I chose the right colors! LOL! But her choice of colors is usually vibrant rather than muted. Jewel tones rather than earthy. So I'd love to see what she'd come up with using this technique.

elegant textures for Christmas

If you ask me what my favorite Holiday color combination is I'd tell you to look no farther than this post. Here it is. All laid out for you. Gold, cream, tan. That sorta thing. And then add all the texture you possibly can. By the way, Spellbinders has some absolutely stunning dies out there these days and I've used several of them on these cards as well as SU's sleigh ride thinlits.


more shaker cards

Ok laugh all you like! Do you spot the "egg" in that globe above? It was NOT meant to be there! And I only saw it now when I uploaded it. I could have deleted it and gone to the work of a new picture, but I figured we all needed a laugh! Anyway, this card as well as the two following are made with the Snowglobe dies and stamp set from Hot Off The Press. Yes, I branched out a bit on these. No apologies!

(Spot my kitchen light reflection in this one? Awful, I know!)

Monday, 9 November 2015
my first shaker card (Christmas)

WOOHOO!! I even impressed myself with this one! LOL! I've been so intimidated by the shaker card instruction tutorials I've seen everywhere that I kept saying, "Nope! Not for me! Can't use my favorite embossing and sponging techniques, plus far too finicky! And too childish, yada yada!" Well, those were all excuses! Here's my first one and lo and behold, I could emboss AND sponge on it AND it's not childish AT ALL!
Try it! I don't have a tute here but you can just do an online search and you'll find instructions all over the place. Or. Do like I did and just strike out on your own and trial-and-error it! I'm gonna make more yet...wait and see! BECAUSE THEY ARE NOT DIFFICULT!
Saturday, 7 November 2015
All Ye Faithful (faux metal technique)

Years ago, my friend Lyndsay from Manitoba introduced me to the faux metal technique. And for years now I've forgotten about it. Just yesterday I thought, "Hey! Right!" And so I found my metalic embossing powders and lo and behold, the All Ye Faithful trio of images worked perfectly for this. I'll tell you briefly what you do, since I just don't have the time for posting a tutorial right now. Scroll down to the bottom of this post and I'll explain a bit...


Grab your Versamark pad and unlid it and pat it onto a piece of cardstock. Pour whichever color embossing powder over and heat emboss. Cool it; repeat. Cool it; repeat till you have a third layer. QUICK before that third layer is cool, press your choice of image stamp onto it. Pull stamp off and you should have something similar to the examples above.
Let me know how yours turn out!
sisal "paper" textured Christmas cards

I went to the local craft store and found this creamy jute-like textured STUFF!! Hardly paper, but so neat to mat my focal point on. Something reminiscent of straw. And I'm quite sure it's suitable for a nativity scene since Baby Jesus surely laid on straw in the manger, don't you think? This image (top) is from SU's "All Ye Faithful" stamp set.

Here I used a sentiment from "Wonderland" as well as the pine branch from last year's "Ornamental Pines" set. THAT is one set SU could gladly bring back. I hear so many people who wish for it again. Especially this very universal pine and cone image. Love that straw here as well.

It's all about textures, and who doesn't love textures?
Tuesday, 3 November 2015
white and silver shepherds

There it is! I don't really know what to say about it, except this card is far far FAR prettier in real life! I've had this white and silver combo playing around in my mind for some time now. Maybe this is what I should do for my next 12-card tutorial, eh?!
hello friend

I enjoy making holiday and seasonal cards, but every now and then I like a change! So here's a Butterfly Basics card for you again! If you don't have this die/stamp set, let me know and I'll grab it for you! It's a Must Have!
Monday, 2 November 2015
laundry room technique Christmas card (LOL!)

I have no "before" picture, but my Fave Five-yr-old stamped and colored this bird image with Stampin Write markers. And then the card disappeared. Several days later, when I went to launder the "whites", there it was under damp tea towels and wash cloths and the ink had done THIS!! The bird is pure white now and the ink is on the edges. Plus it's soaked all the way through to the back. I'd really LOVE to replicate it if anyone could tell me how!!! hahahaha! (No, the whites were ok!)

camo Christmas card for the hunter (Christmas series/tutorials)

I am SO SO SO EXCITED!! I actually accidentally found a way to create a camouflage background! I set out to make 12 outdoors-man hunter-style cards and in the process made a huge life-altering discovery.
I have a son who's heart is in the woods. Out there with the elk and wolves and grouse. I kinda thought of him when I made this batch of cards. They are simple and un-embellished and of course you have the option to step these up if you like. Anyway, Let's get started, shall we? I'll show you how my accident happened!

Ok, first you cut your pieces.
12 pieces Natural cardstock---4 1/4" x 11" (I chose to make my cards the long way)
12 pieces Natural cardstock---4 1/4" x 5 1/2"
12 pieces Early Espresso---aprox. 3/4" x 5 1/2" (Made into banner shape)
Soft Suede---punched into 36--- 1 3/8" squares
Natural---punched into 36---1 1/4" squares

Take your Woodland TIEF and using your brayer roll Mossy Meadow on the opposite side of the "Sizzix" logo. Now HERE'S where my camo accident happened! For fun I spritzed the ink on the folder before running my cardstock (4 1/4" x 5 1/2" Natural) though the Bigshot. Just LOOK how it smudges and smears into the perfect camouflage for that young hunter-man you are raising! You can spritz more or less, depending on how much camo you desire.

Using the Wonderland stamp set and stamp pads in Mossy Meadow, Tip Top Taupe, and Garden Green...

...stamp 12 of each image onto the small punched out squares (Natural).

Assemble it now. I originally planned to adhere my banner on the left side of all 12 card fronts, but I found I was gonna cover up my best gorgeous camo smudges that way, so several of the banners had to land on the right hand side. Using the Mossy Meadow squares, mat the stamped squares on top. Using dimentionals, pop those little framed images up and line them up on the banner.

Here's a nice close-up of how I did that.

It's a little tough to see the sentiment, but I did that on purpose in keeping with the camouflage idea here. I wanted a "long" sentiment, not a "paragraph style". So I grabbed the retired Ornamental Pines "Christmas Wishes" and stamped it beside the matted images. (Look at picture)

There it is! This is the left-hand banner card, and below you see the right-hand matted card along with a nice close-up of that camo! Won't that be a delight to your outdoorsy friends this Christmas?
And how excited I am to at long last come up with my own technique! Ha!!

Friday, 30 October 2015
watercolor lily (hair gel again!)

I love this technique so much I look for ways to use it as often as I can. Here, I used the fern image from Butterfly Basics as well as one of the circle dies to create my "pond". I don't really know how to explain how I did that. I first stamped on the ferns and then chose a circle as a guide to kinda make an approximately accurate fussy-cut window. Or puddle. Or pond. Or whatever that is when you chop an opening into the face of a card! My little zip-lock of slightly tinted (with pool party reinker) hair gel went between two layers. Beneath the gel is my water-colored image of a water lily sort of flower from Remarkable You.
Have YOU tried this method of a neat li'l squishy squashy card? My little 5-year-old friend loves it as much as I do!
Thursday, 29 October 2015
elegant friendship (PCCCS#168)

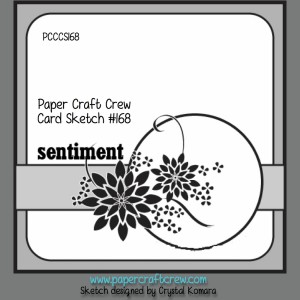
I used an image from Remarkable You again, the flourish from Everything Eleanor and a leetle teeny part of a sentiment from Sheltering Tree. Amazing what you can pull together from myriad stamp sets, isn't it?
Wednesday, 28 October 2015
wedding card for FMS210 (Freshly Made Sketches)


For whatever reason, and maybe because I love love LOVE creating distressed and vintage cards, these challenges from FMS always push me out of my comfort zone. One other thing, they always seem more formal so I end up thinking "wedding; sympathy; that sort of thing". So here we are with a wedding card and I got to use my Remarkable You stamp set as well as my Softly Falling TIEF in a way so totally unlike snow, don't you agree? It kinda reminds me of confetti or baby's breath or pearls...or what else is used at weddings?
To check out this challenge just click on this link: FMS210
Tuesday, 27 October 2015
grateful triple challenge entry


Here's the second:
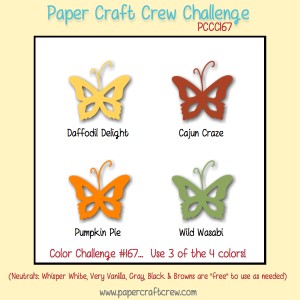
And this one comes from Paper Craft Crew Challenges PCCCS#167.
And here's the third challenge: SU Only Challenges with this challenge being "Thankyou Very Much" using ONLY Stampin' Up products, which I can proudly say I did just that!
I still can't believe my good luck, although it would be fun to make three separate cards for the three different challenges, this just was too good to be true!
Sunday, 25 October 2015
faithful trio (Christmas Series)

No these cards aren't very clear in this picture; sorry! But if you can look closely, you'll see they have a lot of similarities as well as a lot of differences. I made all of them with the All Ye Faithful stamp set and I embossed each image in gold on vellum, coloring them from the back with my Stampin' Write markers, but after that, I tried a different look for each.

Sometimes I like using totally unexpected colors for my Christmas cards. Here I used mostly coral, since Mary's robe is coral.

For the shepherd, I went with earthy and natural tones and textures.

While I think of the wisemen as probably wearing dark rich jewel tones, I lightened it up a bunch, while at the same time keeping this card elegant with softer colors. .
Subscribe to:
Posts
(
Atom
)